by /
We store our pillar videos in multiple places: Google Drive, Descript, and YouTube, as a safeguard against accidental deletion or loss.
But YouTube has strict policies, and raw recordings, especially Zoom meetings, are risky to publish without edits.
These often contain sensitive details such as names, emails, or even CRM screenshots, which YouTube’s automated systems quickly detect.
One overlooked detail can trigger a strike, and several strikes could mean losing our publishing rights entirely.
This article covers two things: how to reupload a video that’s already been taken down, and how to follow our new policy for preventing strikes in the future.
Task checklist
Information needed:
- Reason for removal (exact policy and flagged timestamps).
- Original video file (for editing).
- Transcript of the flagged video (to identify problematic wording).
- Original metadata (title, description, tags) for updating.
- Removal notes from YouTube (can be fed into ChatGPT for tailored compliance suggestions).
Tools needed:
- Video editing: Descript (for cutting, blurring, or adding context).
- Image editing: Photoshop, Canva, or built-in blur/highlight tools.
- AI review: ChatGPT (to analyze flagged transcript and suggest compliant titles, descriptions, and disclaimers).
- YouTube Studio: For monitoring strikes, removals, and reuploads.
Why videos get removed
Most removals happen because personally identifiable information (PII) sneaks into the recording.
An innocent moment like someone introducing themselves with their email address, a chat message flashing on the screen, or a CRM tab left open during screen sharing is enough for YouTube’s algorithms to act.
The root cause is clear: we’ve been uploading raw recordings directly.
The solution is just as straightforward: raw files now live only in Google Drive, and YouTube gets distribution-ready versions that have been reviewed and cleaned.
Step 1: Identifying the problem
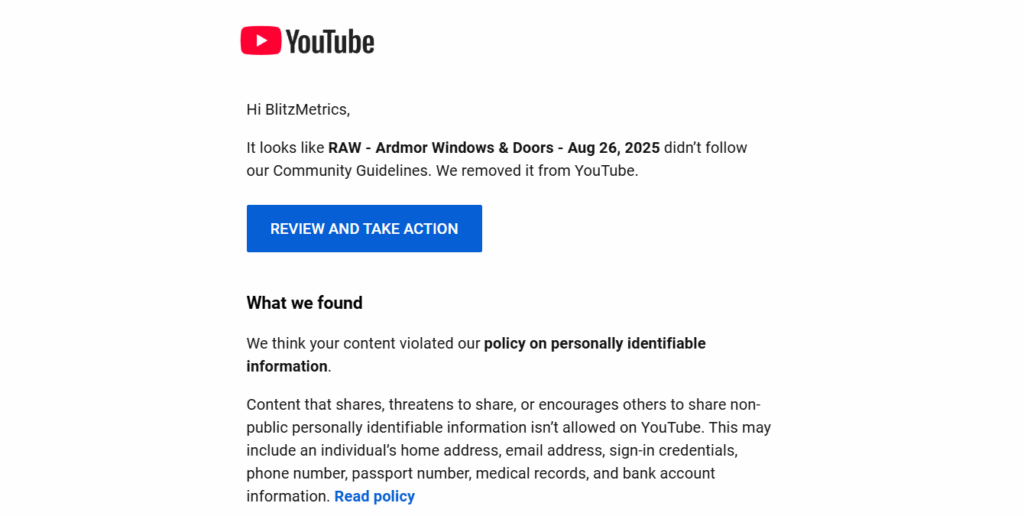
If a video is removed, the first step is to check YouTube Studio for the reason.
The platform shows a notification explaining which policy was violated and may even highlight timestamps where issues were detected.

Knowing exactly what tripped the system saves time during editing.
Step 2: Editing the video
Once you’ve found the problem spots, open the file in an editor such as Descript or Zoom’s built-in tools.
Sensitive data should be blurred, cut, or muted.
Sometimes it’s enough to trim the introductions or cover a section of the screen where personal details appear.
If the context of the video might be misunderstood, adding an opening slide or short voiceover to frame it as educational can also help.
Step 3: Updating metadata
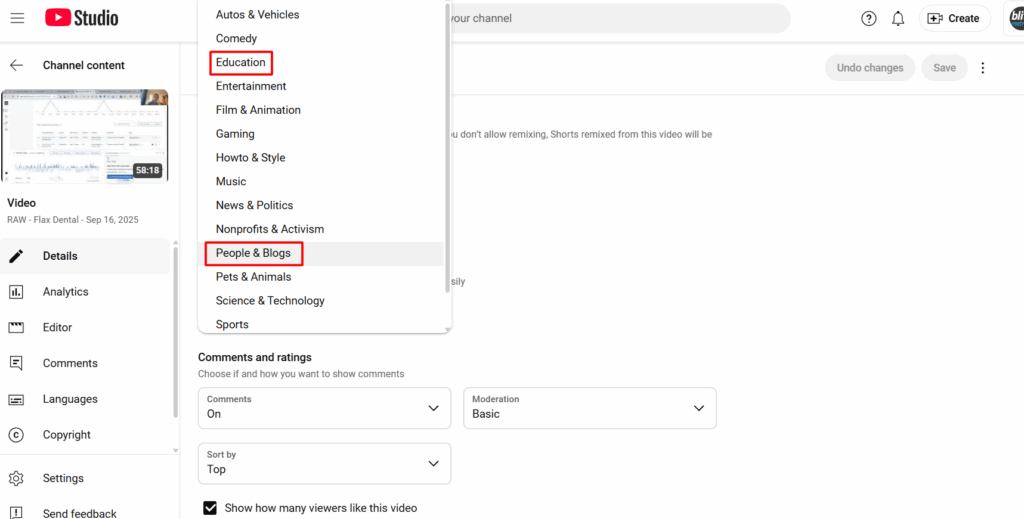
YouTube isn’t just looking at the footage; it also pays attention to how the video is presented.
Titles and descriptions that frame content as educational give you a better chance of avoiding another strike.
For example, if the video discusses a business conflict, call it a “Case Study” or “Documentary.”
In the description, make it clear the purpose is educational, not personal.
Categories such as Education or People & Blogs are safer choices, and tags should reinforce the same intent.
Step 4: Adding a disclaimer
A simple disclaimer can go a long way.
Place it at the beginning of the video and in the description:
“This video is for educational purposes only. All mentions of individuals or entities are based on publicly available information and do not aim to defame or harm any individual or entity.”
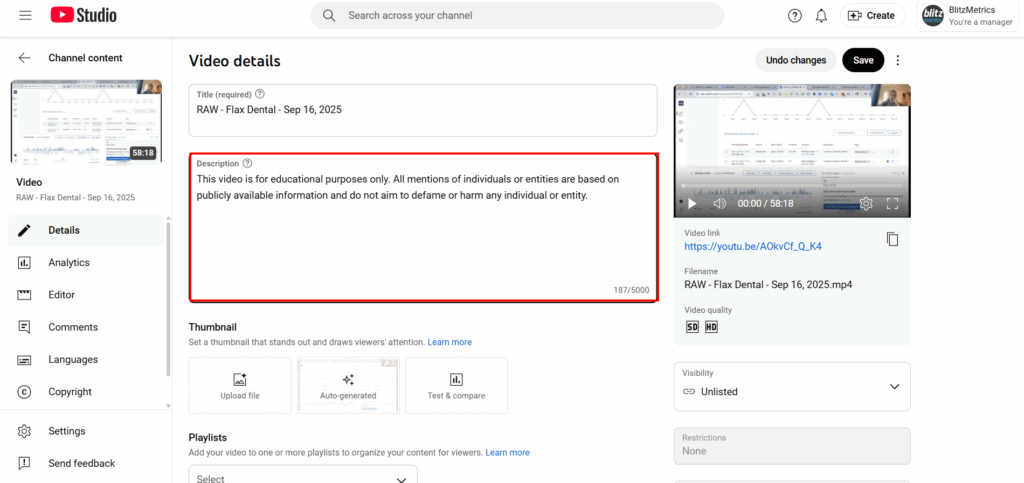
This provides context for both the viewer and YouTube’s review systems.
Step 5: Reuploading and monitoring
With edits complete and metadata updated, reupload the cleaned version to YouTube.
Once the video is live, monitor its status over the coming weeks.
If another strike occurs, revisit the flagged sections and make adjustments.
The new workflow
To prevent future issues, we’ve adopted a simple but strict policy.
Every raw recording is stored in Google Drive first, and only edited versions go to YouTube.
That means Drive serves as our archive, while YouTube is exclusively for distribution-ready content.
It also helps to be mindful during the recording itself.
Use first names during introductions, avoid reading out emails or phone numbers, and only screen share sensitive tools when absolutely necessary.
These small habits make editing easier and reduce the chances of mistakes slipping through.
Why this matters
Following this process protects us from YouTube strikes, keeps client and team data secure, and ensures consistency in how we publish.
It’s also an example of applying RCA/RCF in practice: we identified the root cause of the problem and built a fix that prevents it from recurring.
In short, Google Drive is where the raw files live.
YouTube is where the polished versions go.
By respecting this separation, we can keep our channel safe, professional, and compliant.
Verification checklist
- All flagged content is blurred, cut, or muted.
- Personally Identifiable Information (PII) such as emails, phone numbers, and CRM screens is completely obscured.
- Educational introduction or short voiceover provides proper context.
- Opening slide added if needed to explain purpose and audience.
- Title updated to reflect educational intent (e.g., Case Study, Tutorial, or Documentary).
- Category set to Education or People & Blogs.
- Tags updated to match compliance intent.
- Disclaimer added at the beginning of the video and in the description.
- Transcript reviewed to confirm no PII or sensitive wording remains.
- Clean, final video file stored in Google Drive as the master archive.
- Raw recording stored only in Google Drive, not published.
- Polished version reuploaded to YouTube with updated metadata.
- Video status monitored in YouTube Studio for at least 2–4 weeks after publishing.
- Any new strikes or flags logged with timestamps and removal notes for RCA.

Dennis Yu
Dennis Yu is the CEO of Local Service Spotlight, a platform that amplifies the reputations of contractors and local service businesses using the Content Factory process. He is a former search engine engineer who has spent a billion dollars on Google and Facebook ads for Nike, Quiznos, Ashley Furniture, Red Bull, State Farm, and other brands.
Dennis has achieved 25% of his goal of creating a million digital marketing jobs by partnering with universities, professional organizations, and agencies. Through Local Service Spotlight, he teaches the Dollar a Day strategy and Content Factory training to help local service businesses enhance their existing local reputation and make the phone ring.
Dennis coaches young adult agency owners serving plumbers, AC technicians, landscapers, roofers, electricians, and believes there should be a standard in measuring local marketing efforts, much like doctors and plumbers must be certified.