Steps to Client Onboarding for VAs and Agencies
This guide documents the onboarding process for new clients when we are ready to begin a project. We onboard clients who purchase something from us that is not a course, such as a Power Hour, workshop, or package (e.g., Conversion Engine, Personal Branding, etc.).
What we offer:
Setting up a Power Hour
Task Checklist
You will need the following for this section:
- Access to the operations@yourcontentfactory.com group.
- Access to Keap.
- Access to Basecamp.
- Access to the access@yourcontentfactory.com account.
- Access to Google Drive.
- Access to client assets (Quick Audit part 2).
- Access to Dennis' Google Calendar.
Step 1: Receive notification about a new Power Hour purchase
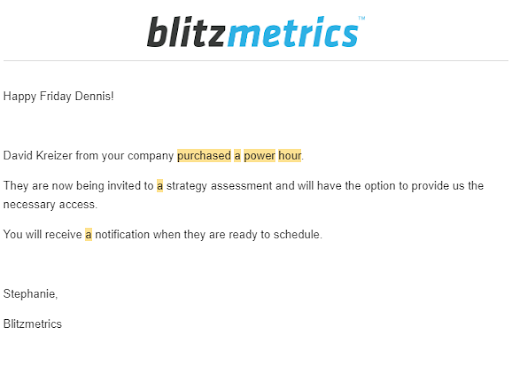
Step 2: Verify the payment


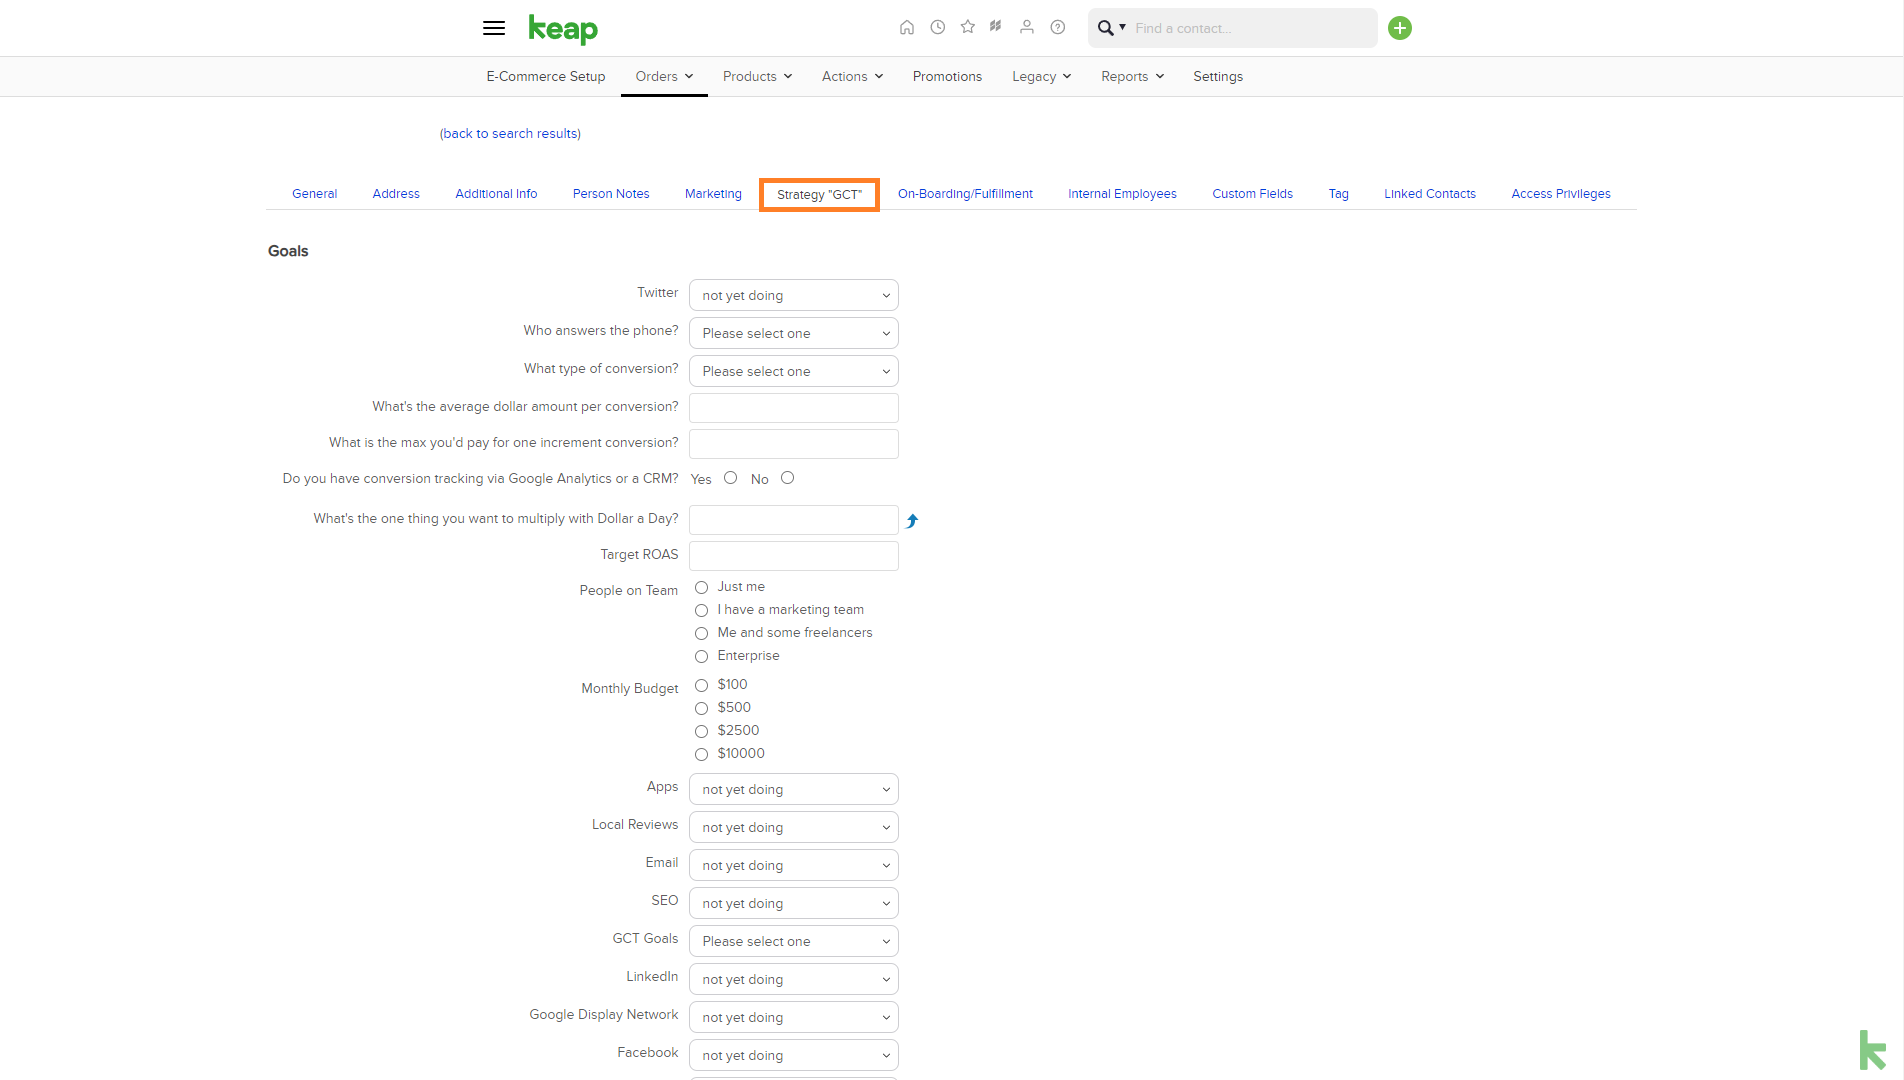
Step 3: Check Keap for the client’s GCT assessment
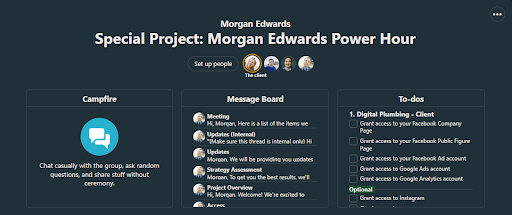
Step 4: Set up the client’s Basecamp project for the Power Hour
Step 5: Inform the client
Step 6: Get access to client assets
Step 7: Conduct the Quick Audit part 1
Step 8: Conduct the Quick Audit part 2
Step 9: Schedule the Power Hour
Next, we need to facilitate a meeting between the client and Dennis. Follow the steps below to set up the meeting.
9.1 Make a thread titled "Scheduling of Power Hour."
9.2 Check Dennis' availability through his Google Calendar.
Take the initiative and suggest a schedule based on Dennis' availability.
9.3 Confirm the schedule with both parties
Get confirmation from the client that they are available on the chosen date and will attend the call.
9.4 Set up the Zoom call.
The Onboarding Process
Why is a well-structured onboarding process crucial?
Onboarding is the most crucial part of the overall client retention strategy because when done right, it reaffirms the client's decision, instilling confidence in their choice of agency and commitment to giving the project the time it needs to succeed.
This requires a streamlined and professional process, where clients can witness the impact at each touchpoint. While the first 30 days of the relationship are critical, it is essential to be proactive during the initial 24 hours and throughout the first two weeks to build momentum.
Mapping out the process for the first two weeks
We aim to ensure a robust and meaningful series of touchpoints that reassure the client of progress in the right direction. With an established process already in place, our focus is on proactive and consistent communication through each touchpoint.
During the initial two weeks, our proactive approach aims to alleviate any pressure or overwhelm felt by the client. By following the steps in a sequential and orderly manner, we can achieve this goal. Clear instructions and maintaining consistent communication help support the client and provide a better understanding of the process.
Task Checklist
You will need the following to onboard clients successfully:
- Access to the operations@yourcontentfactory.com group.
- Access to DocuSign.
- Access to Xero.
- Access to Basecamp.
- Access to Keap.
- Access to BlitzGifts.com.
- Access to the access@yourcontentfactory.com account.
- Access to Google Drive.
- Access to client assets (Quick Audit part 2).
- Access to Dennis' Google Calendar.
Step 1: Receive a notification
We receive notifications about new clients through Dennis, as well as through Infusionsoft (Keap). To prevent any oversights, it is crucial for the designated process owner to check both Infusionsoft and the access@yourcontentfactory.com inbox on a daily basis.
When a notification is received, check Infusionsoft to confirm if we already have the Strategy Assessment. If it is not available, instruct the client to fill out the form at http://yourcontentfactory.com/gct.
Step 2: Collect the required information
Before proceeding, it is necessary to secure the project through an agreement known as the Statement of Work (SOW). The SOW, along with other legal documents, forms the contract.
The following information needs to be collected:
- Client’s full name.
- Business name.
- Business address.
- Business contact information, including contact number and email address.
- Point of contact (POC).
- POC's contact information, such as contact number and email address.
- For businesses with multiple contacts, gather the names and contact information of all individuals involved.
Step 3: Process the SOW (Statement of Work)
This legally binding document outlines the project's specifics, including conditions, deliverables, projected cost, and timeline. These details are typically obtained from Dennis, who handles deal closures with clients. If you have not processed a SOW before, it is recommended to watch the SOW Training video first.
Here's how to process the SOW:
- Collect all necessary information for the SOW, including conditions, deliverables, projected cost, timeline, and the required signatories.
- Download the SOW template.
- Complete the template based on the provided information. Double-check all details before requesting the Operations Manager to review your work.
- Save the completed SOW as a PDF.
- Upload the PDF to our DocuSign account and process the SOW. Ensure that the names and designations of the signatories are accurate.
- Send the SOW to the designated signatories.
Step 4: Invoicing and Billing
After the SOW is signed, the next step is to process the invoice.
- For clients with a package cost of less than $5,000, the invoice is processed through Infusionsoft.
- For clients with a package cost of $5,000 or more, send the SOW and other relevant details to the CEO. Please copy accounting@yourcontentfactory.com in your message.
Step 5: Client Onboarding
After payment is confirmed, it is time to onboard the client.
5.1 Send a 'Thank You' message to the client.
The payment confirms that the person is now a client. We initiate this new relationship by sending an email expressing gratitude and informing the client that the onboarding process has begun.
5.2 Create a project in Basecamp

5.3 Select a project template
When you reach the next screen, choose the option 'Use a template.'

We never have to create a client project from scratch because we have several templates set up to streamline the project creation process. Select the relevant project template.
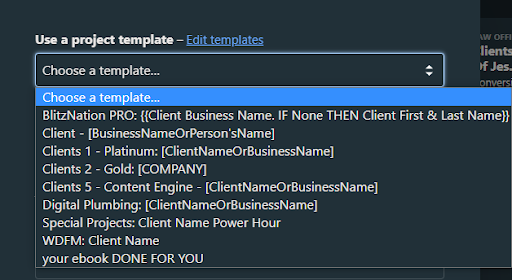
5.4 Create a name for the project
To create a name for the project, consider the following categories or criteria provided below.
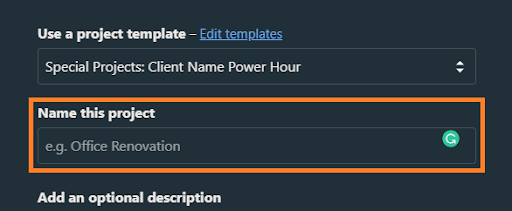
Consider the following categories and corresponding project names:
-
- For Office Hours members, partners, or similar projects: Use "Special Projects: Partner."
- For projects with a cost of $5,000 and below: Use "Clients 3 - QuickStart: [Client Name]."
- For projects with a cost of $10,000 or more: Use "Clients 1 - Gold: [Client Name]."
- For projects with a cost of $20,000: Use "Clients 1 - Platinum: [Client Name]."
5.5 Check all threads
Now, we need to personalize the client-facing threads in the Message Board.

All threads on a client project's Message Board are intended for client interaction, except for one called 'Updates (Internal).' When we initially create a project, the client-facing threads won't have the label 'The client sees this.' This is because these threads are manually opened for the client at a later stage. Currently, our focus is to personalize these client-facing threads.
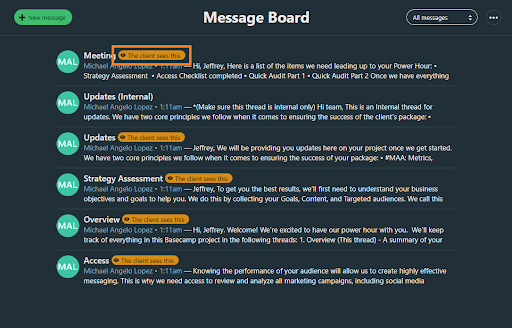
Review each thread individually and replace the placeholder '[Client]' with the actual name of the client.

In the Project Overview thread, identify the people who are responsible, accountable, consulted, and informed (RACI) for the project.

In the Strategy Assessment thread, ensure that the client's Goals-Content-Targeting (GCT) is added. By now, the client should have filled out the form in Step 1, and the GCT should have been sent through our automated sequence. To access the client's GCT, navigate to their Keap record and select the 'Strategy GCT' tab. If you don't have access to the GCT, please request it through operations@yourcontentfactory.com. Once obtained, you can download the client's GCT and save it in PDF, text, CSV, or any other suitable format.

If the client has not filled out the form yet, make a follow-up on the Strategy Assessment thread by reminding them to complete the form.
5.6 Add team members
Add the team members who will be involved in the project (account manager, content, SEO, design, video editor, etc.). Dennis and Daniel should always be added to any client project.


5.7 Add the client and members of their team, including the Points of Contact (POCs), to the project.

Create the company.

Choose “Pick people from a company” to add the client to the company you just created.
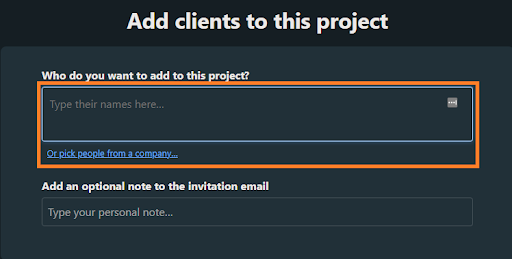
Once done, confirm adding the company and the client to the project.
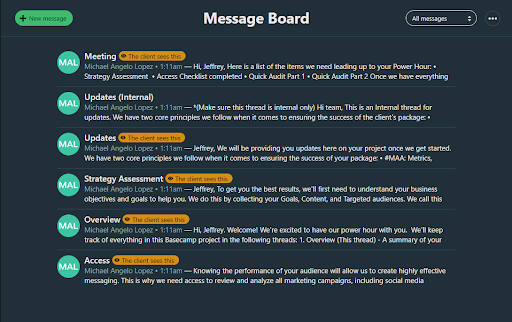
5.8 Open client-facing threads to the client
Open the Meeting, Updates, Strategy Assessment, Overview, and Access threads to the client.
Step 6: Send a message to the client
Step 7: Send a gift to the client
Step 8: Create a Success Tracker
Step 9: Update the Operations Tracker
Step 10: Obtain access to client assets
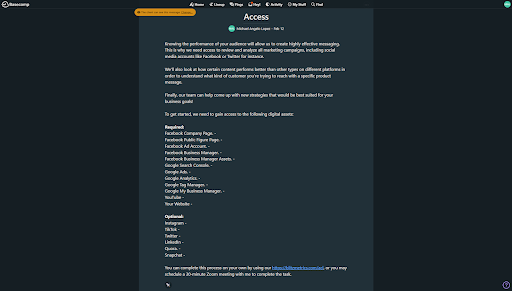
We get access by asking the client to go through the Access Checklist.
10.1 Accept invites
Log into the access@yourcontentfactory.com account and accept all invites from the client. These can be invitations for WordPress, Google Business Profile, Google Ads, etc.
10.2 Issue invites
If we’re still missing access to some assets that are required based on the Access Checklist, we can follow up through the Access thread on the Basecamp project.
10.3 Monitor progress
Monitor access@yourcontentfactory.com to ensure that we get access to all the required assets.
Note: We never log into client accounts directly. We use access@yourcontentfactory.com to do that.
Step 11: Add team members to Facebook pages and ads accounts
Once we have obtained all the necessary access, it's time to add team members to the client's assets, such as Facebook pages and ad accounts. Admin access to Facebook Business Manager is required for this task. If you do not have admin access, please reach out to someone from the Operations team to add the team members. Consider the RACI (Responsibility Assignment Matrix) when determining who should be added to the assets.
To access Google Business Profile, Google Ads, and other accounts, please log in to access@yourcontentfactory.com. If you require access, kindly contact Operations. We use LastPass to share accounts, so make sure you have a LastPass account before requesting access.
Ensure that all assets are organized within Business Manager, making it easy to review the list of accounts and assess the status of each page. It's worth noting that many clients who are not yet onboarded may grant us access to their assets, potentially becoming clients or purchasing a course.
Keep in mind that Business Manager controls access to pages and ad accounts, allowing us to decide who can access what. Granting access to our team members must be done explicitly, as simply being granted access to a page or ad account by a client does not automatically grant access to all individuals on our team.
11.1 Project Tracking
We utilize the Project Tracker to assign ownership to each project, whether it's for a client or internal purposes. This tracker helps us monitor the workload of each specialist and their available time slots.
As clients progress through the Strategy Assessment, providing us with their #GCT (Goals, Content, and Targeting), and optionally granting access, we can track their progress. However, manual tracking of courses or Power Hours in the Project Tracker is not necessary due to its tedious nature.
It is crucial to note that even though this is a client-driven process, you are responsible for ensuring its timely completion. Regardless of whether the client has steps left to complete, they expect us to be actively working on their project. Therefore, maintain consistent and courteous follow-up communication while awaiting access to prevent any perception of inactivity.
Follow up diligently until we have obtained access to all assets, allowing us to promptly hand over the project to the Project Lead or Account Manager. Maintaining rapid communication and updates (CID) with the client keeps them engaged and avoids any confusion or inquiries about the project's progress.
Verification Checklist
Use this checklist to ensure that the task was done successfully:
- The client accomplished the GCT.
- Part 1 of the Quick Audit was accomplished immediately upon confirmation of the payment.
- A schedule is set for the call.
- We have the required information for the SOW.
- The SOW was created with the agreement details incorporated into the document and approved by Dennis.
- The approved SOW was uploaded to DocuSign and sent to the signatories.
- An invoice was created through Xero and sent to the client.
- There is confirmation of the payment.
- A "Thank You" message was sent to the new client.
- The client's Basecamp project exists with all relevant threads personalized.
- The Basecamp project uses the proper title.
- The relevant threads are open to the client.
- The client was informed about their Basecamp project.
- A gift was sent to the client.
- A Success Tracker was created for the client.
- The Operations Tracker was updated.
- An access audit was conducted.
- Authorized team members were given access to the client's assets.
- Part 2 of the Quick Audit was accomplished the moment we got access.
- The Project Tracker was updated.
- The client has full access to the Content Factory Academy.