Step-by-Step Tutorial: How to Modify Domain DNS Nameservers in Namecheap
If you’ve registered your domain with Namecheap and need to point it to a different hosting provider or server, updating the DNS nameservers is the key. Follow these step-by-step instructions to change your domain’s DNS nameservers effortlessly.
Table of Contents
Why Change DNS Nameservers?
Changing your domain’s DNS nameservers is essential when switching hosting providers or using a specific DNS service. This ensures your domain points to the correct server, which is vital for:
– Website Accessibility: Ensuring your website is reachable by users.
– Performance Optimization: Leveraging the features of a new hosting provider.
– Security Enhancements: Utilizing improved security features of different DNS services.
Step 1- Log in to Your Namecheap Account
Changing your domain’s DNS nameservers is essential when switching hosting providers or using a specific DNS service. By updating the nameservers, you ensure your domain points to the correct server, maintaining your website’s accessibility.
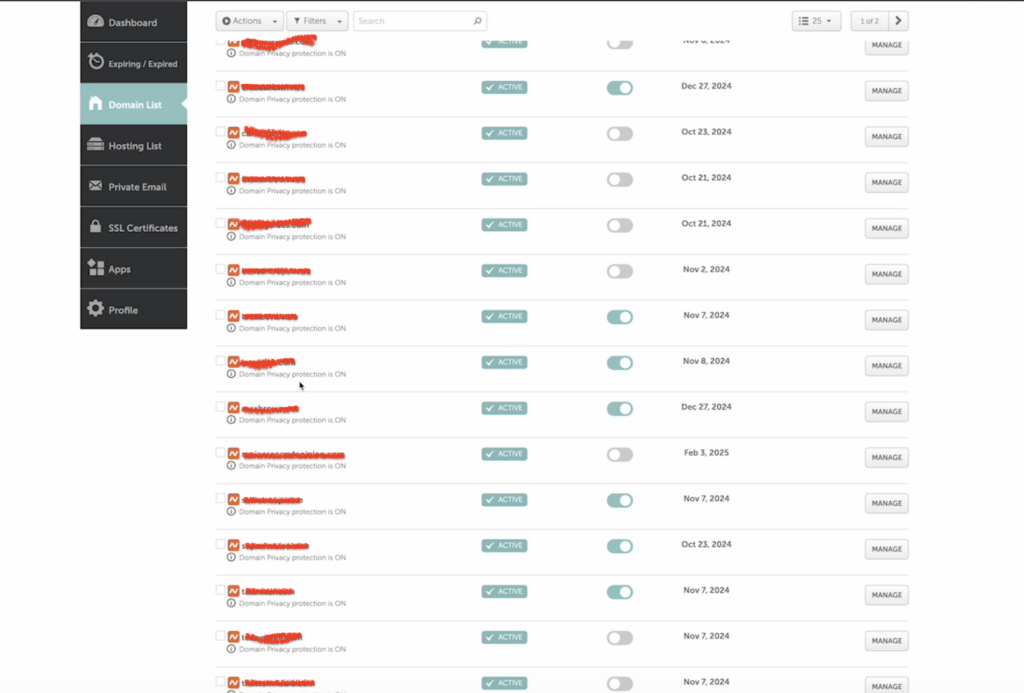
Step 2- Access the Domain List
Once logged in, navigate to the “Dashboard” or “Domain List” section. This is usually on the left-hand side of the screen.

Step 3- Select the Domain
Locate the domain for which you want to change the DNS nameservers and click on it to access the domain management page.
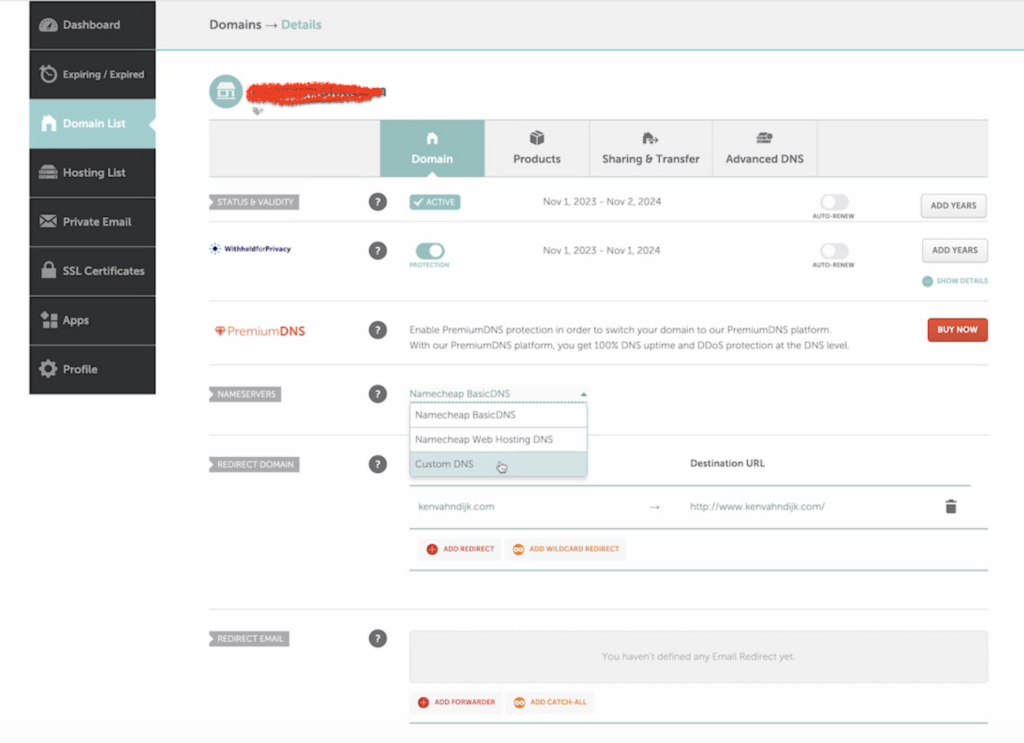
Step 4- Navigate to the Nameservers Section
Look for an option like “Nameservers,” “DNS Management,”.

Step 5- Choose Custom DNS
Select the option that allows you to set custom DNS or nameservers. This is often labeled as “Custom DNS” or “Use Custom Nameservers.”
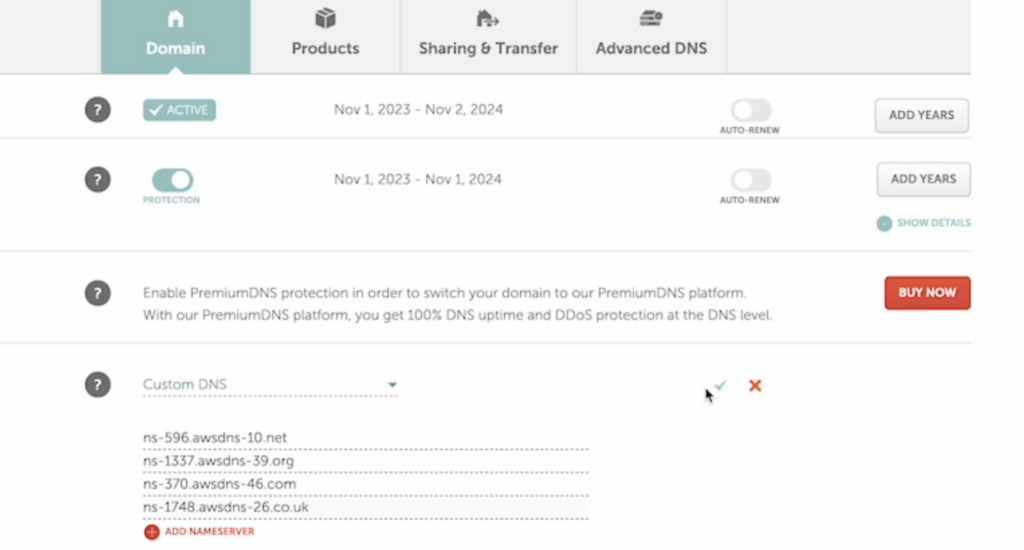
Step 6- Enter New Nameservers
Now, input the new nameservers provided. Typically, you’ll have at least two nameservers, and they will look something like:
- Nameserver 1: ns1.yourhostingprovider.com
- Nameserver 2: ns2.yourhostingprovider.com
Double-check the information to ensure accuracy.

Step 7- Save Changes
Click the green tick icon to save (as shown in the image above)
Conclusion
Changing domain nameservers can be simple for those familiar with hosting accounts but may appear technical for others. Remember that propagation can take up to 24 hours, and entering incorrect nameservers may cause website errors or unavailability. Seek assistance if needed. This beginner-friendly guide helps, but caution is essential when altering nameservers. If you use GoDaddy to manage your domains, here is how to change domain DNS on GoDaddy.
