This guide will teach you how to create a media room and publish press releases on Cloud Signals (CS). For context, please visit Cloud Signals Explained to see a brief explanation.
Task Checklist
- The entity already exists
You can only execute the task once the entity (client account) has been created. So, create the entity first before continuing.
There are three options available for setting up media rooms:
- Branded Domain
- Hosted Domain
- Branded Integration
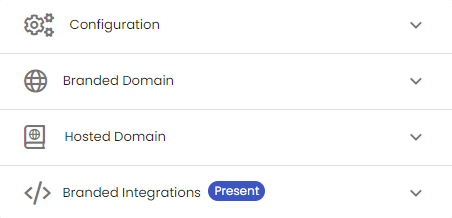
The options vary depending on the type of subscription. For free accounts, only the third option will be available.
Branded Domain:
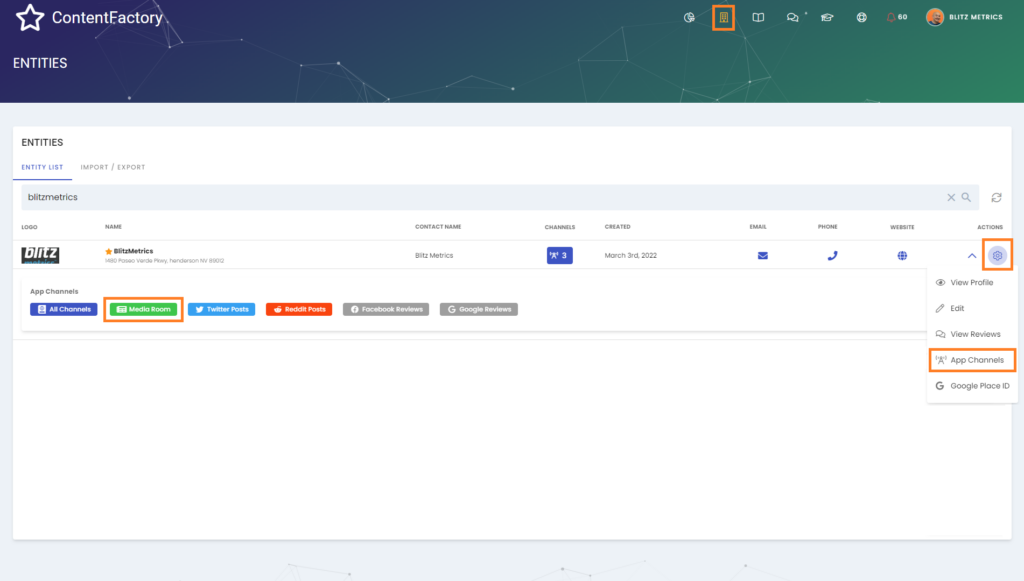
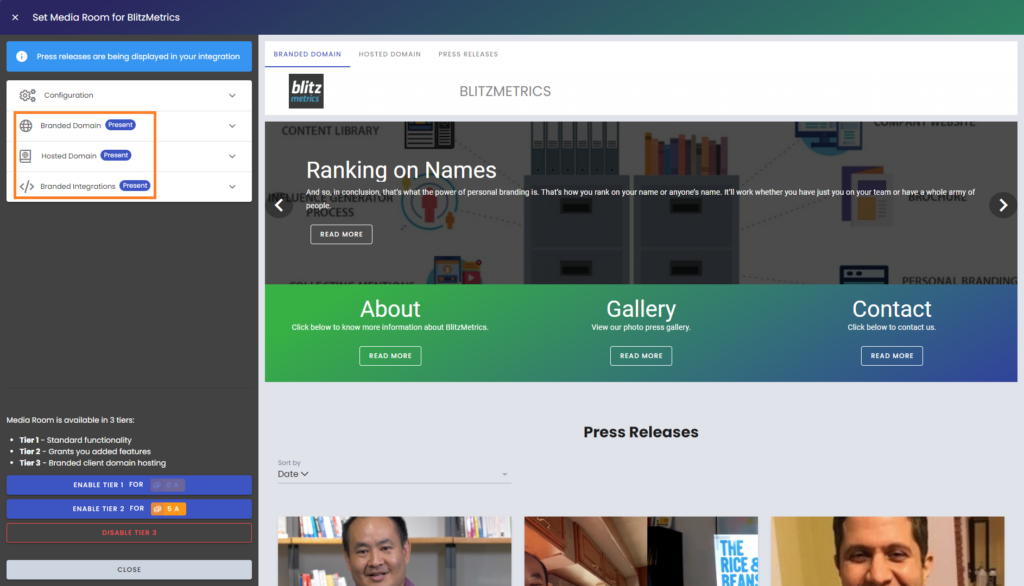
- Open the entities screen by clicking on the Entities menu item. In the list, click on the gear icon to
the right of the client name that you want to create the media room and select App Channels
from the drop-down list. It will open up the screen with the Media Room button:
- After you click the Media Room button, you will have three options (again, it depends on the subscription plan):
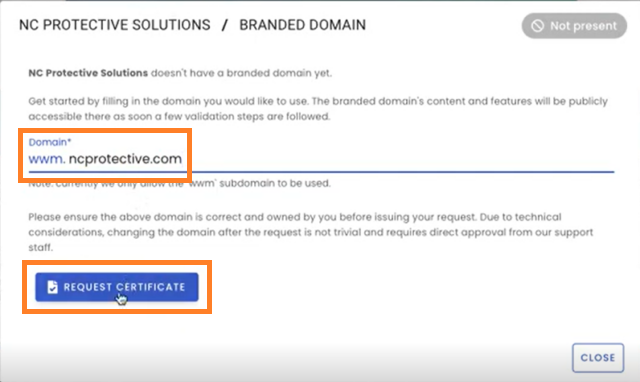
- After selecting Branded Domain, input the domain name and click on “Request Certificate” on the next screen.
That will provide the first set of CNAME records:
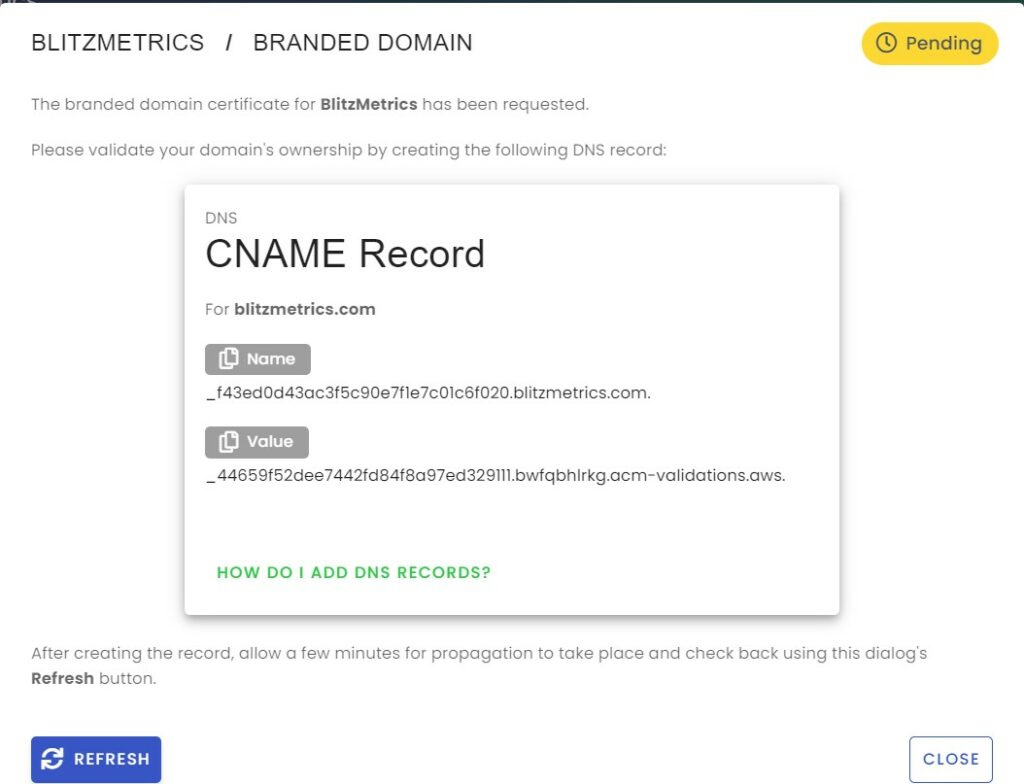
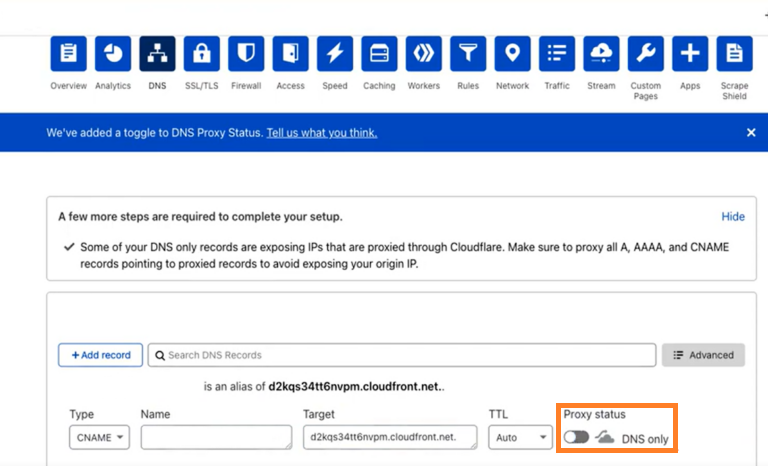
- Next, copy the name and value (target) one by one and paste them into the DNS Manager like GoDaddy, CloudFlare and paste these as a new record:
- Then, click on Refresh on the screen under #4 above. That will load a confirmation screen for domain validation. Next, request the branded domain by clicking on the button:
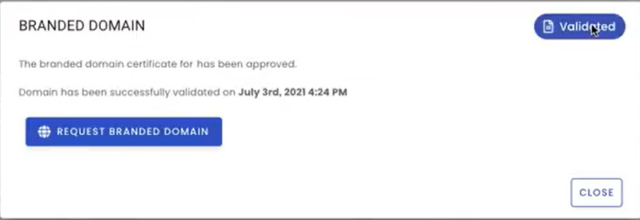
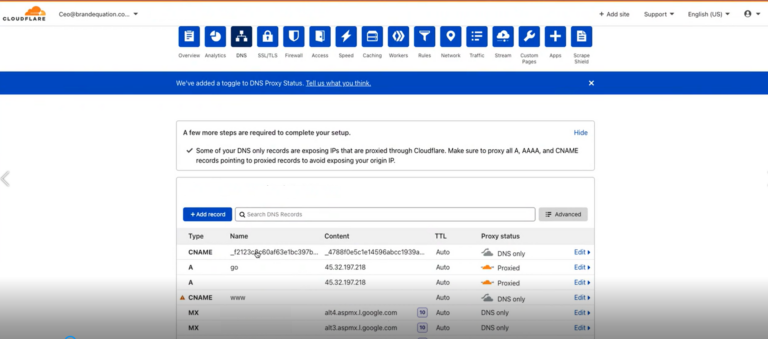
- The next screen will bring up the final CNAME record that needs to be added again as a record in the DNS Manager. You should also change the proxy button to “DNS only” by clicking that button:
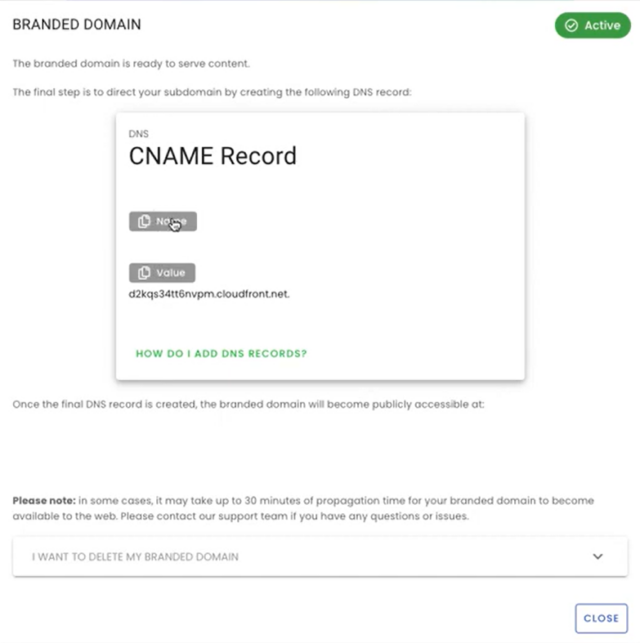
- The media room is now published. Note that the time it takes to go live varies depending on the system. While CloudFare will probably take only ten minutes to update, DNS record systems like GoDaddy may take hours.
Hosted Domain:
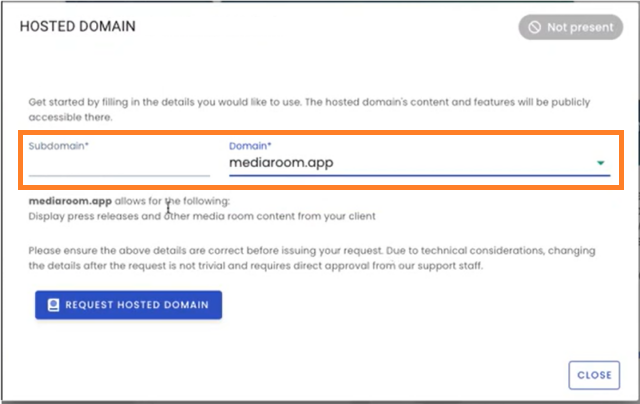
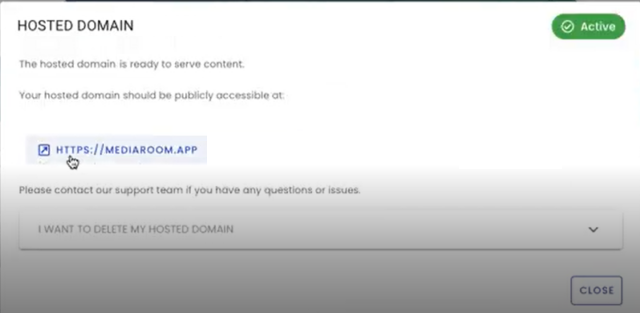
- When you select “Hosted Domain,” the screen below will appear where the subdomain name and domain name are selected. Note that the domain field is a drop-down list containing only one option, “mediaroom.app.” Select it and click on “Request Hosted Domain” at the bottom of the screen:
- That’s it! The media room is active:
Branded Integration:
This option is used to set up a media room on the client’s website directly.
- After selecting “Branded Integration,” the screen below will appear (media room drop-down) from where you will choose the “Create Media Room Code” option:
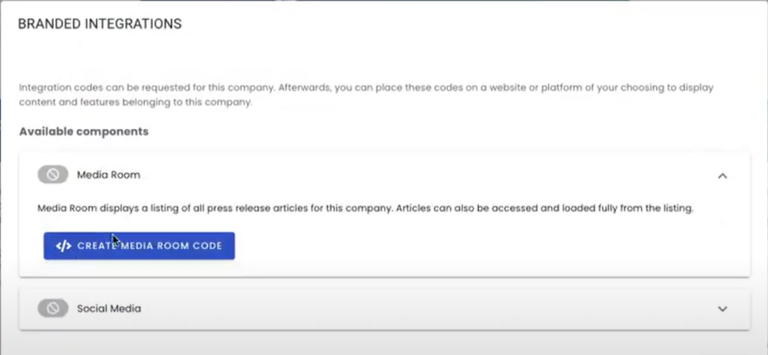
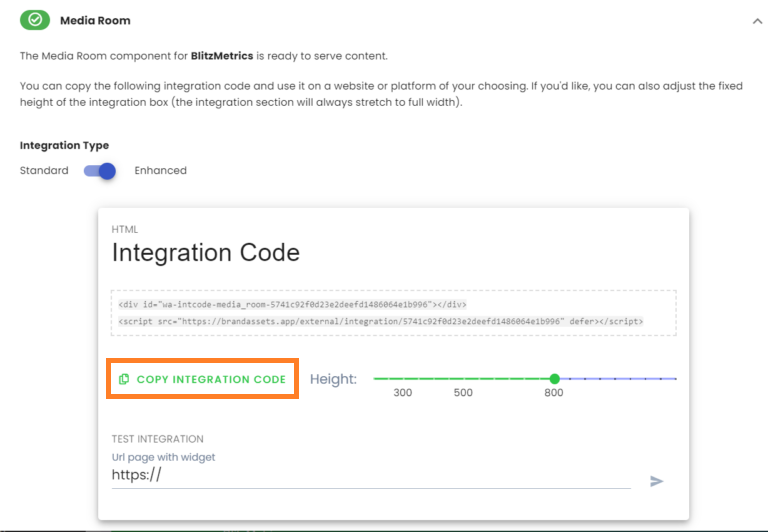
- It will create a code for the media room, which you should copy:
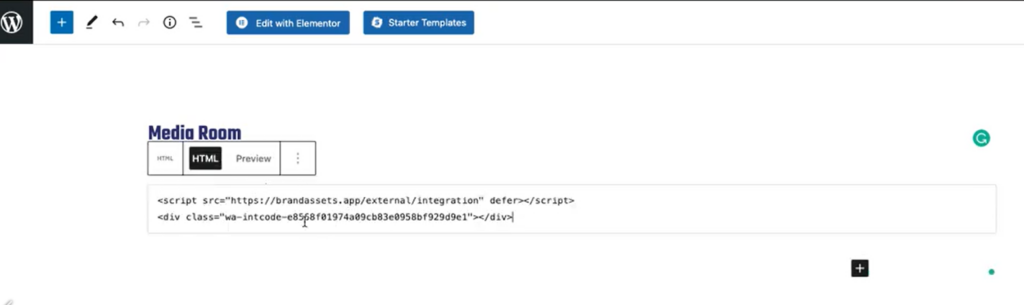
- Log into the client’s website (usually WordPress), and create a new page called Media Room. Paste
the HTML code and publish:
The next step is to create articles/press releases in the media room. Here’s a one-page checklist for the task:
Verification Checklist
- The correct integration is active (Branded Domain, Hosted Domain, or Branded Integration).
- For Branded Domain – The correct domain name was entered.
- For Branded Integration – The integration code was copied and reported in the proper Basecamp thread.
Publishing a Press Release on CS
Task Checklist
- The media room is active.
- For Branded Domain – Edit access to the client’s DNS Manager.
- For Branded Integration – The media room page exists (using the integration code) on the client’s site.
- The article is ready for publishing.
Creating the Press Release
1. Create a new press release using the ‘Create From Scratch’ option under Content in CS and repurpose the article for PR;

2. Follow the step-by-step procedure within CS for PR creation.

3. Perform self-review and save it as a draft for client/peer/supervisor review. The supervisor QAs the PR and requests revisions if any. The supervisor publishes the PR. Please remember that the PR writer should never publish a PR.
4. Inform the client once it is published.
Verification Checklist
- The media room exists.
- All fields are populated in all steps in the PR creation process.
- The draft is accurate and free of errors.
- The draft was reviewed by the client, a peer, or a supervisor.
- The PR is now live.
- The client knows about it.
If you enjoyed this tutorial, be sure to explore our Task Library for a plethora of additional tasks waiting to be mastered!