by /

If you manage client websites, as an SEO consultant, digital marketer, or agency owner, Google Search Console (GSC) is one of your most essential tools.
It confirms Google is properly indexing a site, flags technical issues early, and gives you the hard data clients actually care about.
Before you spend a dime on ads or backlinks, you need visibility into what Google already sees.
GSC shows:
- Which pages are indexed.

- Search queries driving traffic.
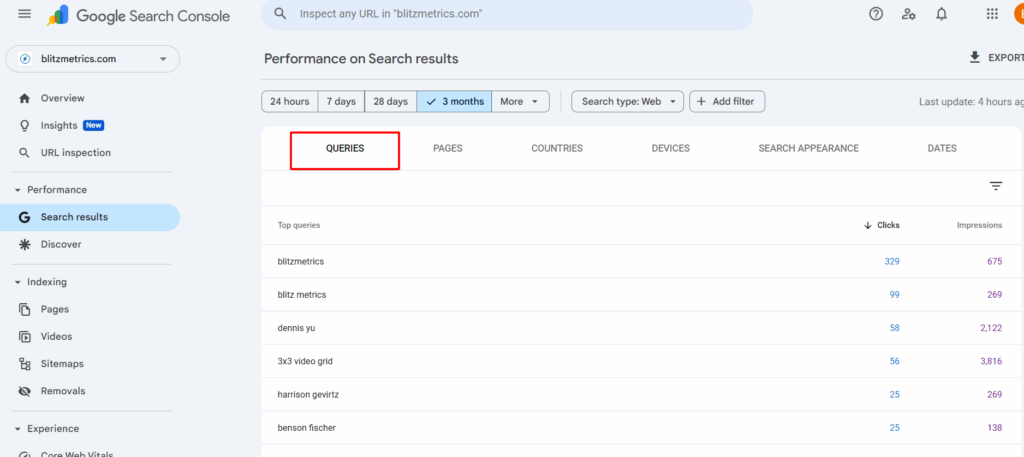
- Mobile and Core Web Vitals performance.

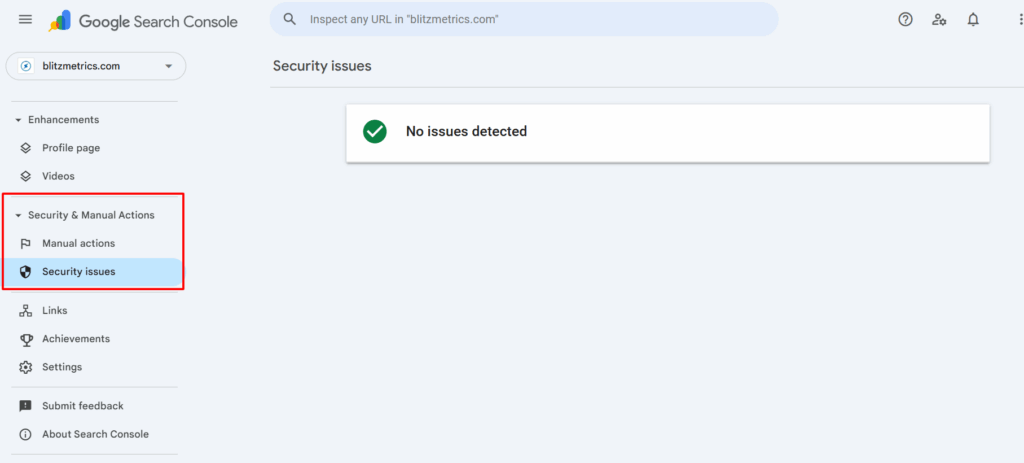
- Manual actions or security issues.
If you don’t have this data, you’re flying blind, and so is your client.
Task checklist
Information needed:
- Client’s WordPress admin login.
- Client’s Gmail address (to grant them access).
- Our shared access email: access@yourcontentfactory.com
Tools required:
- Google Search Console.
- WordPress Admin Panel.
- “Code Snippets” or “Insert Headers and Footers” plugin.
Step-by-step guide
Step 1: Log into GSC
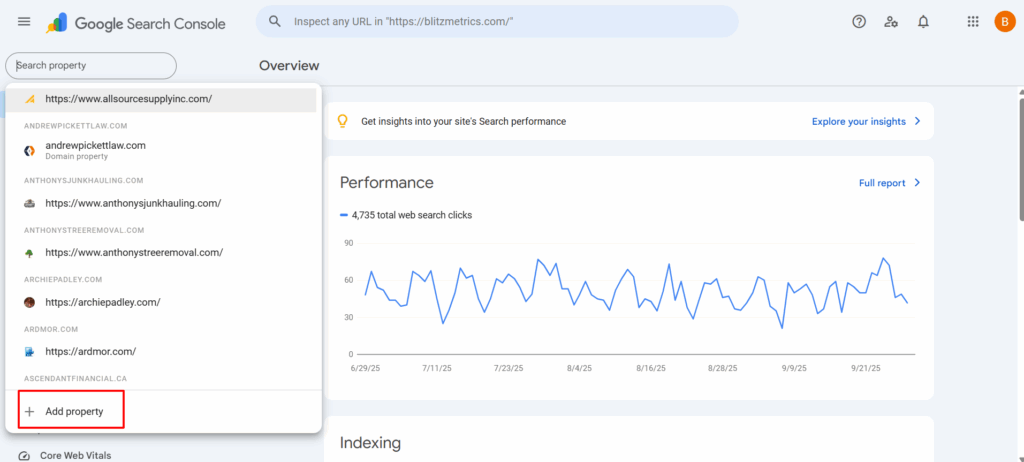
Use our shared account (access@yourcontentfactory.com) to log in to Google Search Console.
Click Add Property.
Step 2: Choose URL prefix
Select the URL Prefix option.
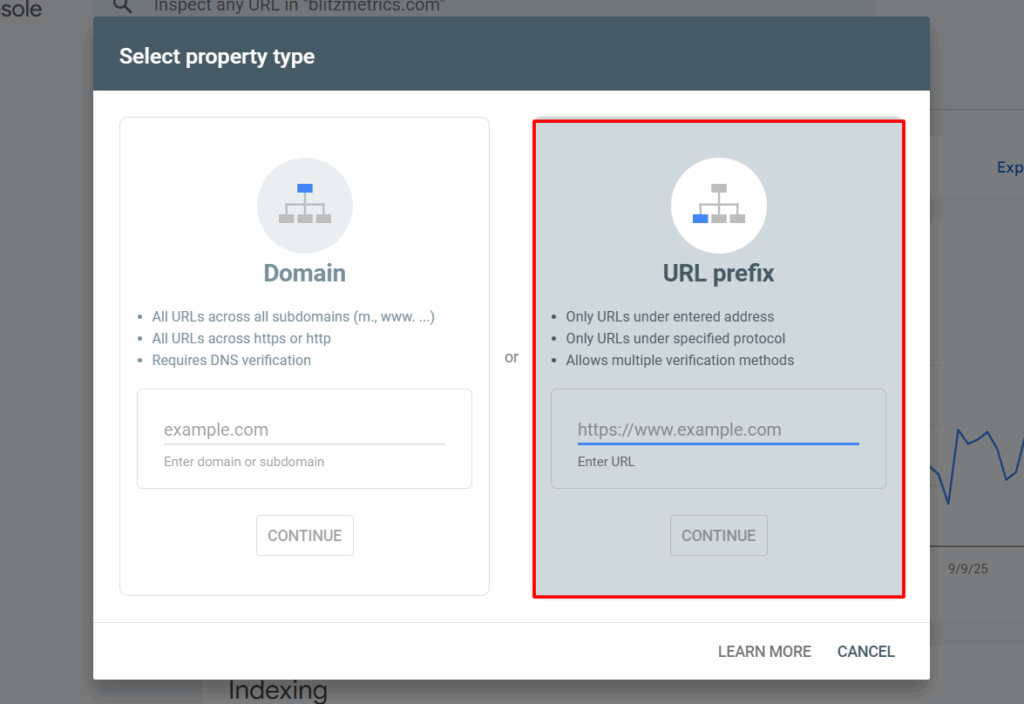
Enter the full URL of the site (for example, https://clientdomain.com) and click Continue.
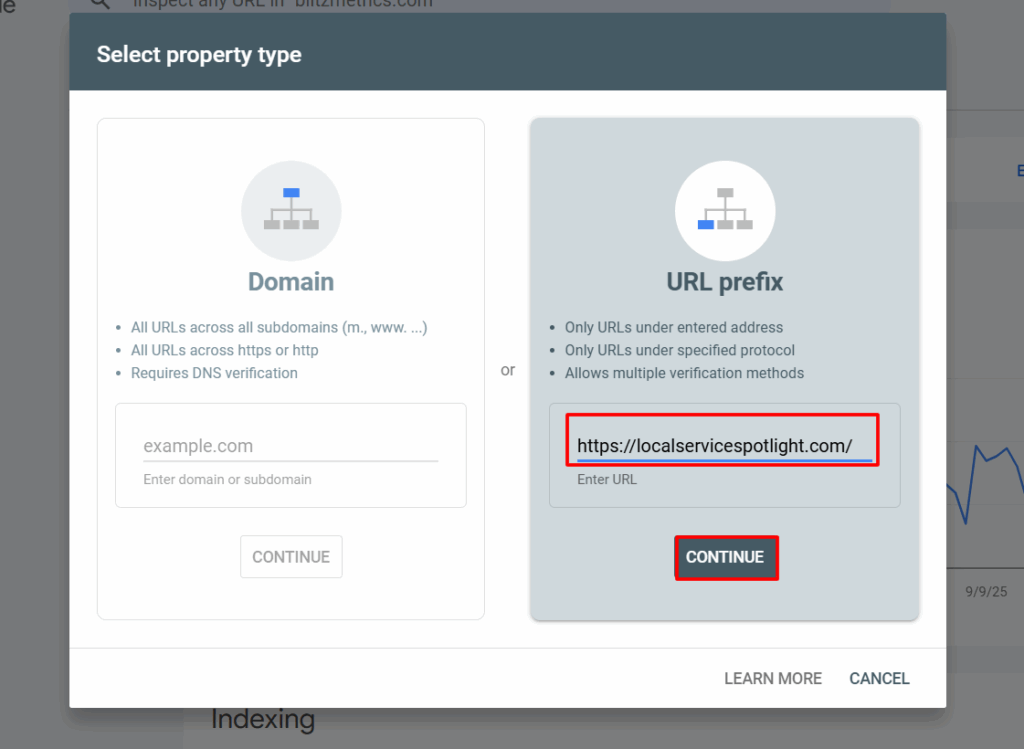
We use URL Prefix instead of Domain verification because it’s quicker and offers multiple methods of verification.
Step 3: Verify ownership with HTML tag
Search Console will provide a meta tag for verification.
It looks like this:
<meta name=”google-site-verification” content=”XXXXXXXXXXXX” />
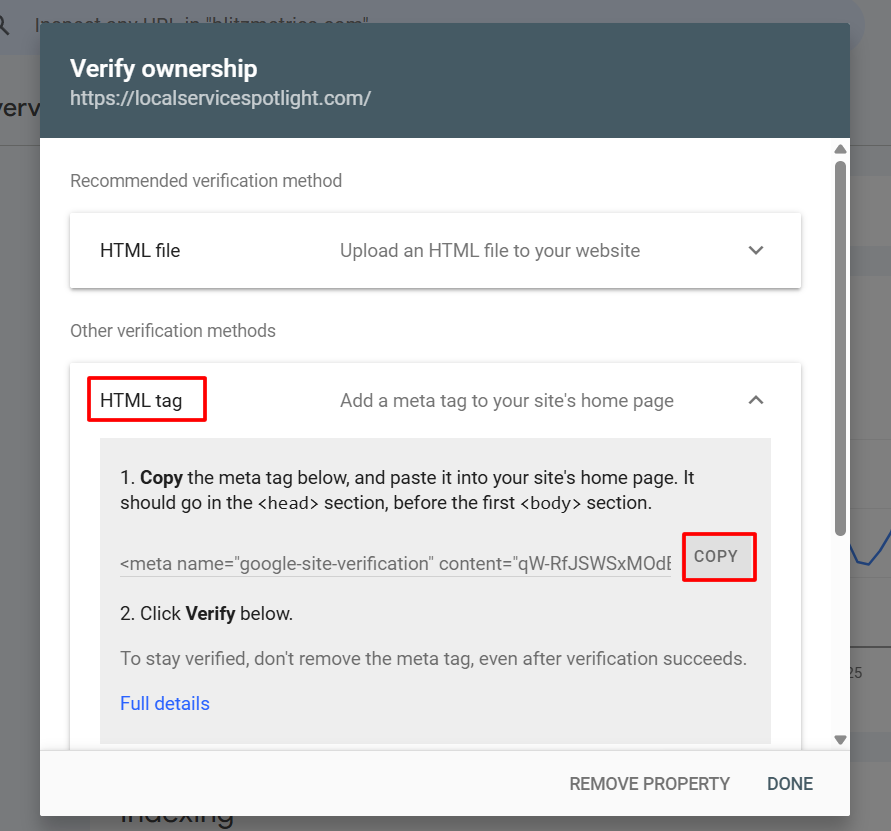
Copy this tag.
In WordPress, go to the “Insert Headers and Footers” or “Code Snippets” plugin and paste it into the <head> section of the site.
Save changes.

Then return to GSC and click Verify.
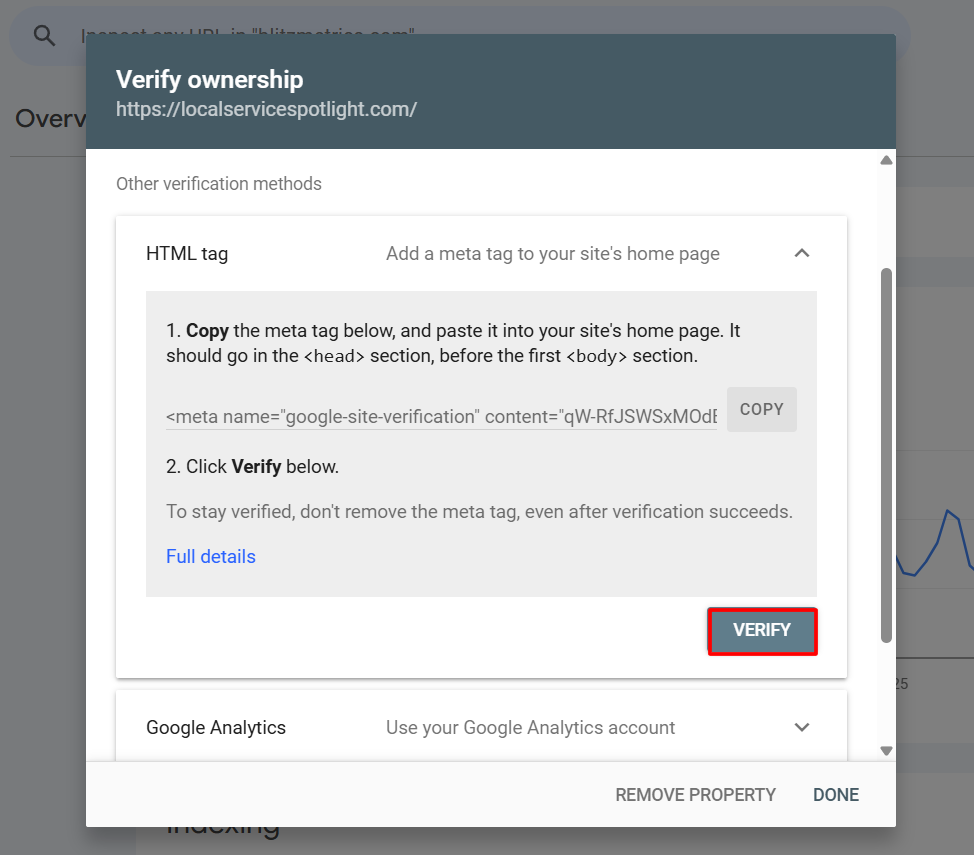
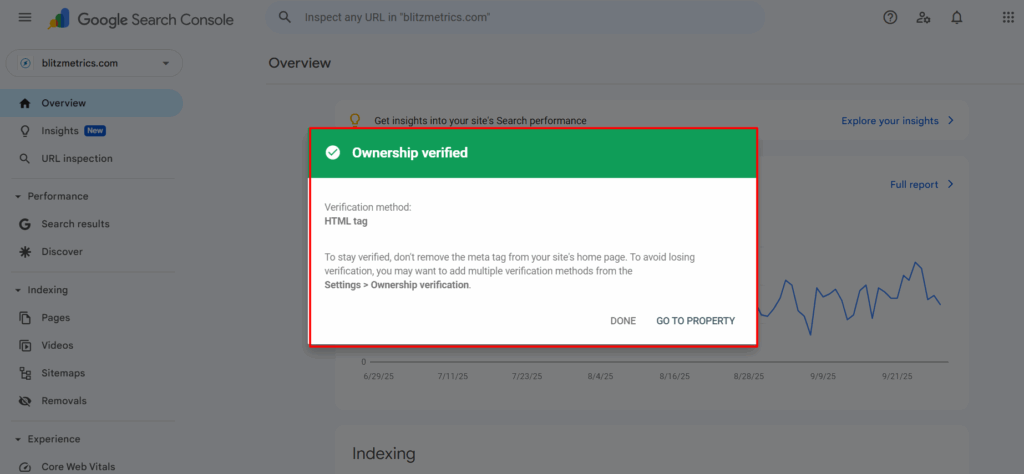
If done correctly, ownership will be confirmed instantly.
Step 4: Grant client access
Once verified, go to Settings → Users and Permissions → Add User.

Enter the client’s Gmail address and grant them Full Access.
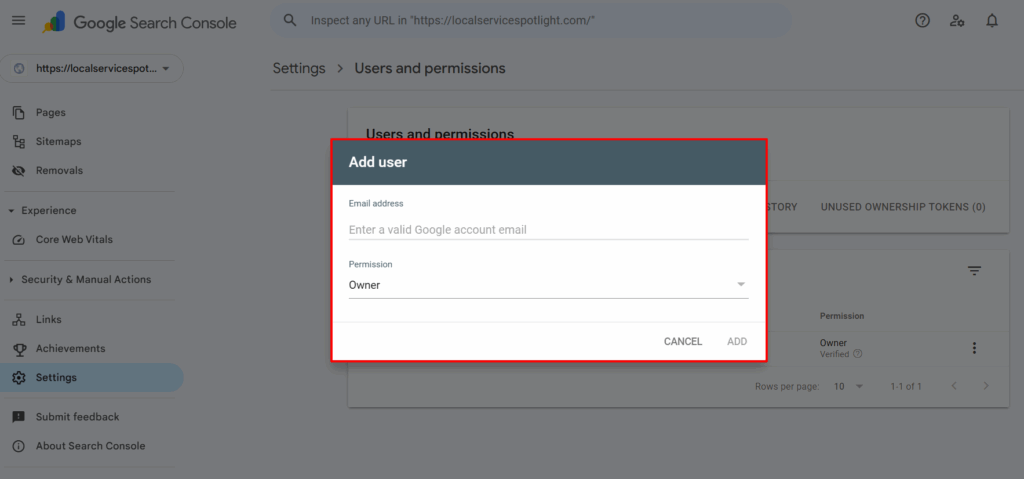
This allows them to manage their property while keeping our admin role intact.
Step 5: Confirm setup
Check that the property now appears in both our account and the client’s account.
Leave the verification tag in place to ensure ownership remains valid.
Send the client a confirmation email (include a screenshot for clarity).
Tips and common mistakes
- Never remove the tag. Deleting the verification tag breaks ownership.
- Match the exact URL. Include https:// and www if applicable.
- Alternative methods: If you can’t access WordPress, verify using DNS TXT record, Google Analytics, or Tag Manager.
Verification checklist
Before closing out the task, confirm:
- Property added under access@yourcontentfactory.com
- Verification succeeded via HTML tag.
- Client granted full access.
- Verification tag remains active in WordPress.
- Client received confirmation email.
Outcome
Once setup is complete, you and your client will both have access to critical search insights from day one, letting you make smart SEO decisions instead of guessing.
This exact process is part of our AI Apprentice program, where we train young adult to implement SEO systems that actually move the needle.
All our training, templates, and live workshops are available at High Rise Influence.

Dennis Yu
Dennis Yu is a former search engine engineer who has spent a billion dollars on Google and Facebook ads for Nike, Quiznos, Ashley Furniture, Red Bull, State Farm, and other organizations that have many locations.
He has achieved 25% of his goal of creating a million digital marketing jobs because of his partnership with universities, professional organizations, and agencies. Companies like GoDaddy, Fiverr, onlinejobs.ph, 7 Figure Agency, and Vendasta partner with him to create training and certifications.
Dennis created the Dollar a Day Strategy for local service businesses to enhance their existing local reputation and make the phone ring. He's coaching young adult agency owners who serve plumbers, AC technicians, landscapers, roofers, electricians in conjunction with leaders in these industries.
Mr. Yu believes that there should be a standard in measuring local marketing efforts, much like doctors and plumbers need to be certified and licensed. His Content Factory training and dashboards are used by thousands of practitioners.