How To Create A Service On SPP: A Step-by-Step Guide

Creating a service on SPP (Service Provider Pro) is straightforward and allows you to efficiently manage your services, clients, orders. Follow these detailed steps to set up a new service on an SPP account.

Steps:

  • Log in to Your SPP Account
  • Access the Services Section
  • Add a New Service
  • Fill in Service Information
  • Select Payment Options- One-time Service& Recurring Service
  • Assign a Team Member
  • Save the Service Information
  • Configure the Intake Form
  • Add Tasks (Optional)
  • Set Intake Form Rules (Optional)
  • Save Changes
  • Access Service Options
  • Copy the Service Link
  • Conclusion


    Step 1: Log in to Your SPP Account

    Go to the SPP Dashboard, enter your credentials and log in.


    Image

    Step 2: Access the Services Section

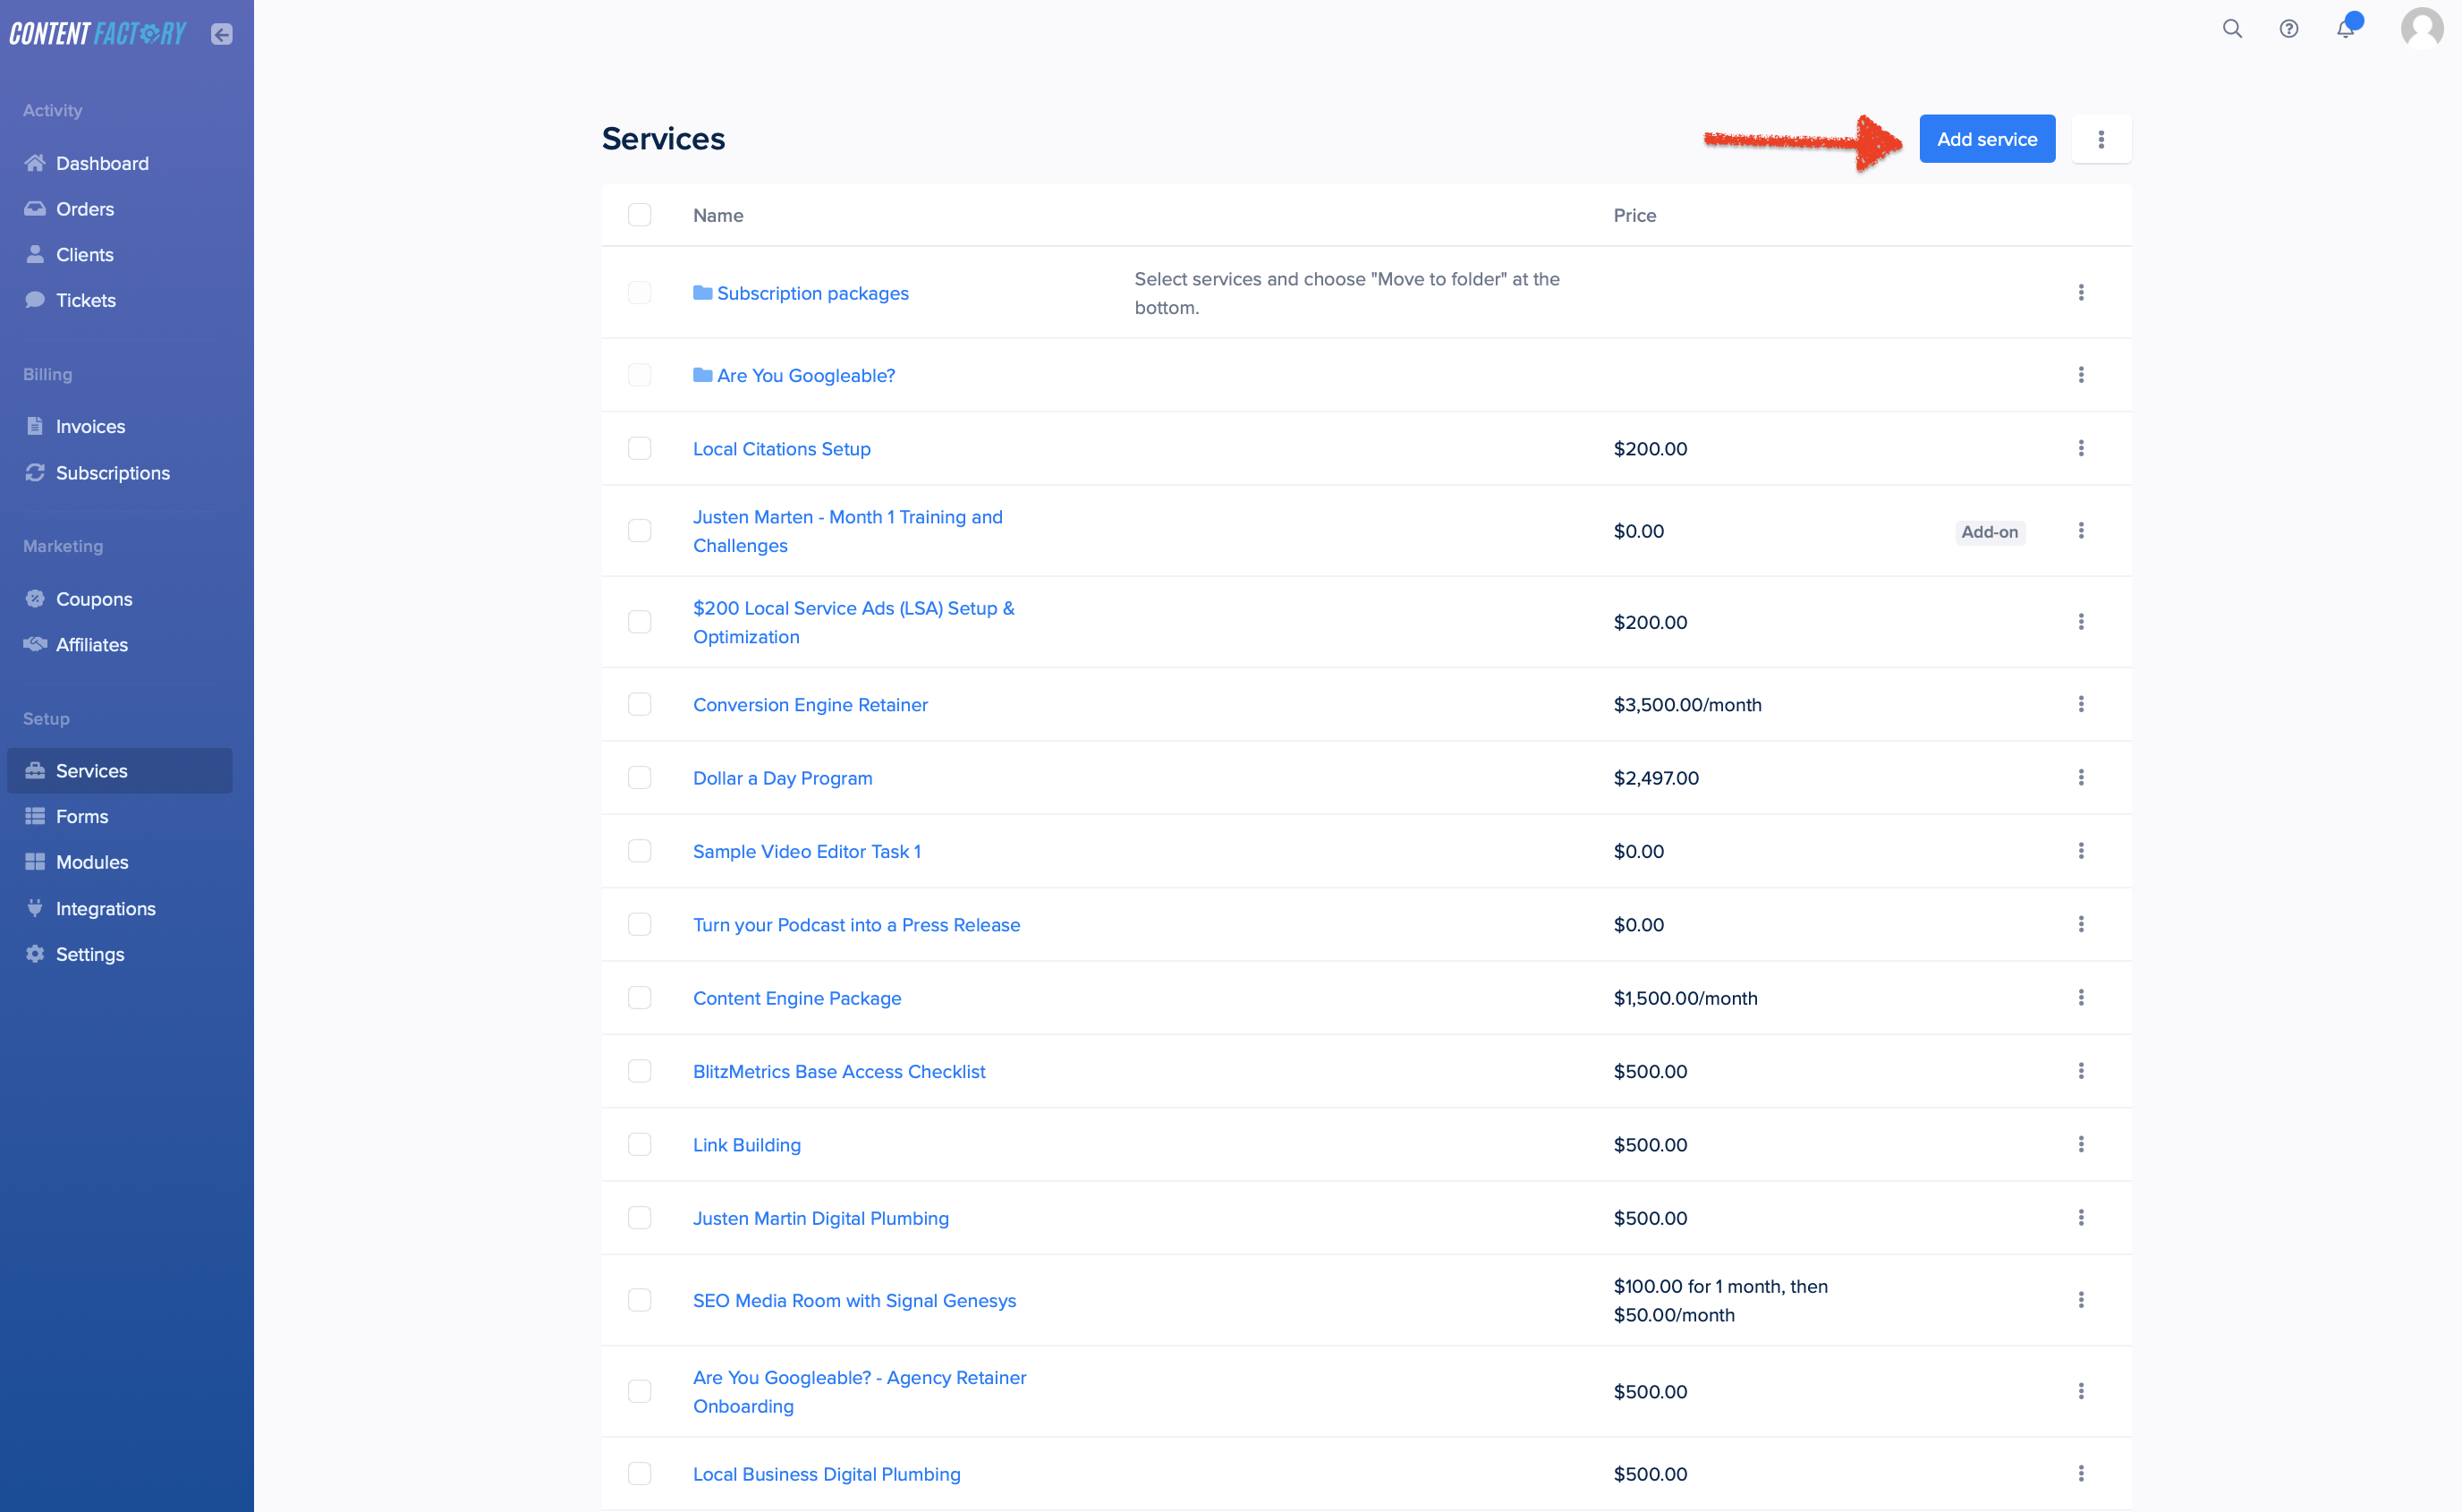
    Once logged in, navigate to the “Services” section from the dashboard.


    Image

    Step 3: Add a New Service

    Click on “Add Service” to start creating a new service


    Image

    Step 4: Fill in Service Information

    Name: Enter the name of the service.
    Description: Provide a detailed description of the service.
    Image: Upload an image that represents the service.
    Pricing: Set the pricing for the service.


    Image

    Step 5: Select Payment Options

    You have two payment options for the service:

    One-time Service: Choose this option if the service is a one-off purchase:


    Image

    Recurring Service: Select this option for services that require recurring payments:

    Image

    Step 6: Assign a Team Member

    Select a team member who will be responsible for the service once an order is placed.


    Image

    Step 7: Save the Service Information

    After filling in all the required information, click “Save changes” to save the service.


    Image

    Step 8: Configure the Intake Form

    Navigate to the “Intake Form” section.
    To collect client information post-payment, drag the desired fields from the right bar to the left side of the screen. These fields can include company address, phone number, zip code, etc.


    Image

    Step 9: Add Tasks (Optional)

    If there are any step-by-step guides or scheduled tasks associated with the service, add them in the “Tasks” section.


    Image

    Step 10: Set Intake Form Rules (Optional)

    Configure any specific rules for the intake form similar to the tasks setup.


    Image

    Step 11: Save Changes

    Don’t forget to click “Save changes” after configuring the intake form and tasks.


    Step 12: Access Service Options

    Go to the services page.
    Click the three dots next to the service to view additional options.


    Image

    Step 13: Copy the Service Link

    From the options, copy the service link to share it with clients or for other purposes.


    Image

    Conclusion

    Creating and configuring a service on SPP is an efficient way to manage services, clients, orders, offerings. By following these steps, you can ensure that services are set up correctly and ready for client orders.